Showing posts with label Facebook. Show all posts

Tuesday, May 18, 2021

Amazing Tip - Fixing Facebook Oops Moments

Facebook - Editing your posts

Yes, there is an "oops" option

You've finished writing your latest Facebook update and hit the Post button. A few seconds/minutes/hours later, when you're rereading what you wrote, you realize there is an error or you accidentally posted the same thing twice. It's that duh moment where you would like to use your Undo button. Well, you can!

Every update gives you the ability to both Edit and Delete the post. First, you have to find the post. You can either look down your wall posts until you see the post or go to your timeline to find the post. Because of the way Facebook plays with what's displayed on your wall (don't get me started about this!), I recommend going to your timeline. Remember to get to your timeline, just click your name on the upper left side of the screen. To see your wall posts click the Facebook icon on the upper left side.

In either case, you should the three horizontal dots, known as the "more" symbol on the upper right side of your post. You may have to move your mouse on the post to see this. When you click on it you will see a short menu that includes "Edit" as well as "Delete". Use these options to either make adjustments in your post or delete it. That's it, all is well with the world again and your friends probably didn't have time to see your mistake.


-----------------------------------

My book, 100 Amazing Computer Tips - Shortcuts, Tricks, and Advice to Help Everyone from Novice to Professional, is available now at Amazon.com and Barnes & Noble in both print and ebook formats. 

Happy Computing!

Diane

Don't forget to click the Subscribe to 100 Computer Tips in 100 Days via the email link on the right side of the screen so you get email alerts when Diane adds a new post.

Want more tech news or interesting links? You'll get plenty of both if you keep up with Diane McKeever, the author of 100 Computer Tips in 100 Days, by subscribing to her Facebook posts or visiting her web page, www.dianemckeever.com

Friday, October 9, 2015

Taming Your Facebook Experience

Taming Your Facebook Experience


Have you found that your Facebook experience is getting worse and worse because your friends are playing, and reporting on, more games? Or that you're seeing more ads about things you're not interested in? Or that you're missing updates from people you really need to keep up with? Well, you need to know that you have so many options that will change the way you view your friends updates that you'll look forward to checking your Facebook every day...really.

How you see your friends updates on Facebook

Some time ago Facebook changed the way you view your friends updates. Rather than viewing everything that everyone posted, Facebook now shows you only "Top Stories" in your News feed. Who determines what's a Top Story, why the folks at Facebook. How do they determine this? According to Facebook, "The stories that show in your News Feed are influenced by your connections and activity on Facebook. This helps you to see more stories that interest you from friends you interact with the most. The number of comments and likes a post receives and what kind of story it is (ex: photo, video, status update) can also make it more likely to appear in your News Feed." So if you have friends that don't post much or that don't include pictures or videos, you probably won't see their updates.

But wait, you can change the way you're viewing your News feed! Just to the right of the word "News feed" on the upper left of your screen, you will see a little "V". Click on it and choose "Most Recent". The News feed will now show you all of the updates with the most recent at the top. You would think that by choosing this you would be done...oh no. Facebook doesn't profit from this setting as much as they do when they control what's in your News feed so you will have to check every week or so to make sure this setting is still on.

What Kind of Friends Do You Have?

The second setting you will want to change is to identify the friend level for each person, or at least do this for the people you really care about, or don't so much care about. By default everyone is just a regular "Friend", not a Close Friend or an Acquaintance. In the Top Stories scenario discussed above, Friends would probably be the first ones bumped from your News feed unless you Like, Comment or Share their updates frequently. To change a person from just a friend to an elevated status of "Close Friend" or "Acquaintance" go to one of their posts and hover (don't click) over their profile picture. A window will pop up so that you can choose their friendship level from the Friends list. Hover on the Friends menu  and make your choice by clicking the appropriate option. As you can see from the screen shot above, this is where you can Unfriend someone...but don't do that, continue reading and you'll find out how to hide friends.

According to Facebook, here is the distinction between a "Close Friend" and an "Acquaintance", "Close Friends list - Add your best friends to your Close Friends list and you'll see everything they post in News Feed. You can even jump straight to a view of your News Feed that only shows their photos and news. You can also receive notifications when they post updates, so you don't miss anything important.
Acquaintances list - Add friends like old classmates or business contacts to your Acquaintances list and you'll see less of them in your News Feed. We'll still show you important things they post -- like when they get married or move to a new city -- so you don't lose touch completely."

By choosing the friendship level you are technically adding people to a list. I don't want to talk about lists here, that will be the topic of another article.

You'll notice "Get Notifications" is the top option in this menu. If you select this you will get a message in the message menu telling you that this person has updated their status. Use this for people whose status updates are REALLY important to you...your kids, grands, spouse????

Following vs Unfollowing

Now that we've gotten the people you like organized, how about the people who kind of annoy you but you don't want to unfriend them. The unfollow option is for those folks. They can still write about their favorite topics but you don't have to see them....win-win. If you want to see what they have written lately you can visit their timeline and check it out.

From the screen shot you'll also notice an option to "See First". Facebook added this in early 2015 to give you the option to see the posts of specific people first in the News Feed. Leaving it as "Default" puts them back in the Top Stories pot.

Game Updates

So your friend is a little addicted to the computer and spends hours playing games...good for her/him but why do you have to see their game levels? NO! Those updates can be turned off from their end but if they haven't figured that out, you have some control too. The next time you see one of the game updates move your mouse on to the post and move to the small "V" that appears in the upper right side of the screen. Click on it and choose "Hide all from (game) app". Done, you'll never see another update from anyone playing that game! You will have to do it again if they ever restart their Farmville farm.

Turning Off Notifications
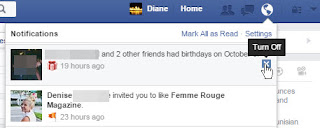

Once you have commented on a friends post you will be notified, from the notification menu, every time someone else comments on or likes that post. You may not want to see these notifications. You can stop them by clicking on the Notification Menu, scrolling down to the specific notification and slide down to the little X that appears, and click on the "Turn Off" X. You will then see a a confirmation of that action and you will click to assure Facebook that you really don't want to see additional notifications.

There now, don't you feel better about your Facebook experience already. More tips to follow.

Happy Computing!

Diane

BTW, have you bought my book on Amazon yet? 100 Amazing Computer Tips is waiting for you there. This book makes a great gift for any seasoned computer user as well as the newbie. 


Monday, June 30, 2014

Amazing Tips - The Art of Hovering

The Art of Hovering

Getting more from your software

I am frequently asked how I learn new software and keep current with new releases. The primary approach I use is to hover.

According to Merriam Webster, there are many uses for the word hover including:
  • to float in the air without moving in any direction
  • to stay very close to a person or place
  • to stay near a specified point or level
When learning new software I am referring to the third use of hovering. I move slowly across any toolbars that are available, pausing at each item. As I do so a balloon label generally appears giving me some insight into the use of the tool. This is quite helpful because it is not uncommon that the icons defy deciphering and the balloon label is of limited help. At least at that point I can go to a browser and search for more information about the tool since I now know what it's called.

I think it's generational but, the graphic designers who come up with the size/shape/color of the tools often have different perspective than I do and different from the people I work with. In the early days of computers, the designers came up with the blue floppy disk to represent "Save". Twenty five years later I'm still pointing it out to people and explaining that it is the tool to use to save their work. The response I get is predictable. I hear everything from, "I thought it was a 50's TV set", to "What's a floppy disk." I used to carry a floppy in my bag to demonstrate the likeness to the save button but, without a machine to read them, my floppies didn't survive the last move.

One of my favorite discoveries that I found using the hover technique was to locate the "missing" dialog boxes I had become accustomed to using in Microsoft Office programs. When Microsoft did away with menus with the 2007 version of the office suite, I could no longer go to the Format menu to format text and paragraphs...not until I hovered and discovered the "Show dialog box" option on the ribbon. Now when I want to use advanced features in Word, features that the engineers didn't include on the ribbons, all I have to do is click the Show dialog box option.

Write a comment about a tool you learned about when you were hovering.


Have you bought my book yet? If not, why not??  100 Amazing Computer Tips - Shortcuts, Tricks, and Advice to Help Everyone from Novice to Professional, is available NOW at Amazon.com and Barnes & Noble in both print ($14.99) and ebook ($7.99) formats. There's also a handy link on top right side of this window for your shopping convenience. If you've bought my book, THANK YOU! Please consider writing a review on Amazon.com.

Happy computing!

Diane

Don't forget to click the Subscribe to 100 Computer Tips in 100 Days via email link on the right side of the screen so you get email alerts when I add a new post.

Monday, May 5, 2014

Amazing Tips book now available

Amazing Tips, the book, has been released!

I am pleased and excited to announce that my book, 100 Amazing Computer Tips, is finally available from Amazon in both print and ebook formats.

The book is based on the top 100 tips in this blog, which were reorganized and expanded. In addition I included printable tip cards for many of the popular software programs.

100 Amazing Computer Tips is the first in a series of Amazing Tips books that will be developed on a wide variety of subjects. I will be writing many of the computer based books but am looking for writers to author books on other topics. The Amazing Tips books could become the new Dummies series...but for smart sophisticated people like you! If you, or anyone you know, would like to be considered for the Amazing Tips series, please contact me.

You can go to Amazon.com NOW and make your choice there between the print and ebook formats. The print version is 14.99 and the downloadable ebook version is 7.99. If you've already bought a book, thank you. I hope you would consider reviewing it on Amazon for me. Your feedback is important.


Happy Computing!


Diane

Don't forget to click the Subscribe to 100 Computer Tips in 100 Days via email link on the right side of the screen so you get email alerts when Diane adds a new post.

Want more tech news or interesting links? You'll get plenty of both if you keep up with Diane McKeever, the author of 100 Computer Tips in 100 Days, by subscribing to her Facebook posts or visiting her web page, www.dianemckeever.com . 

Monday, November 25, 2013

Tip #116 - Spell-Checking in Your Browser

100 (or more) Computer Tips in 100 (or more) Days

Tip #116 - Spell-Checking in Your Browser

When you're filling in information using your browser, there is a spell check option that's available to help you. I noticed that when posting on Facebook or creating an email in my Gmail account, a red squiggly underline would appear below words that were not in the dictionary. This gave me a great sense of comfort
because I am not the best speller in the world. I got comfortable giving the word my best shot and the program would let me know if I was right or wrong. And then one day my lovely red squiggles stopped appearing. I knew that I hadn't suddenly learned how to spell so I figured out that somehow my spell checking tool got turned off...but where was the tool and how do I get it back on!

My initial thought was that the spell check option was in Gmail or Facebook but I couldn't find any documentation to support that. Then I remembered I had been having trouble with my Chrome browser and maybe that was the source of my problem...and it was. If you're not seeing the red squiggles when you're entering text in a multi-line text box...on any website...find the directions for your browser below and make sure your spell check is turned on. This is helpful not only for your email but it will help on websites such as Amazon, TripAdvisor or Yelp when you're writing reviews.

One more thing, when you see a squiggly red line, move your mouse on it and click with your right mouse button (Ctrl click in the Apple environment). A menu of choices will pop up including some suggestions for the correct spelling of the word. You might also consider using "Add to dictionary" for words that are spelled correctly but are not in the dictionary. If you do that you never see the squiggly line under that word again.

Here's the directions for four of the top browsers:

Google Chrome

Mozilla Firefox

Internet Explorer

Safari

I thought I would share an interesting observation with you about my blog. Twice as many people visit my blog using Chrome browser than the Internet Explorer, which is the second most used browser for visitors. It shows that I have very smart visitors.

Please share this tip with your spelling challenged friends, you'll be glad you did.

Happy Computing!

Diane

Don't forget to click the Subscribe to 100 Computer Tips in 100 Days via email link on the right side of the screen so you get email alerts when Diane adds a new post.

Want more tech news or interesting links? You'll get plenty of both if you keep up with Diane McKeever, the writer of 100 Computer Tips in 100 Days, by subscribing to her Facebook posts or visiting her web page, www.dianemckeever.com . 

Saturday, March 16, 2013

Tip #44 - Friend Lists in Facebook


100 Computer Tips in 100 Days

Tip #44 - Friend Lists in Facebook


A list in Facebook is a way of controlling who has access to posts on your Facebook wall. They are really easy to create and use. You already have, thanks to the Facebook people, three lists: close friends, acquaintances and restricted:

Close Friends: You can add your best friends to this list to see more of them in your news feed and get notified each time they post. You also have the option to turn these extra notifications off.

From your news feed, click Friends in the left column. You might have to click More to see the Friends section.
  •  Click Close Friends to view the list.
  •  Click the Notifications drop-down in the top-right corner.
  •  Choose whether you want to turn off these extra notifications.


Acquaintances: This list is for friends with whom you don’t need to stay in close touch. People on your acquaintances list will rarely show up in your news feed. You can also choose to exclude these people when you post something, by choosing Friends except Acquaintances in the audience selector pull-down menu when you create a post. By default it says “Friends”.

Restricted: This list is for people you've added as a friend but don’t want to share with, like your boss. When you add someone to your Restricted list, they will only be able to see your Public content or posts in which you tag them. Public includes anyone on the internet --people who are not your friends on Facebook, as well as people who are not in your school or work networks, whether or not they have Facebook.

To see which list someone is on click the More link in the Friends section on the left of your screen and then click the See All Friends button at the top. All of your friends will be listed with an icon indicating which primary list they are on. You can also add them to additional lists here.

Let’s create a new list. 
  • Click the Home link (along the top-right of every Facebook page)
  • In the left column click the More link next to Friends
  • Select the list you want to edit or click Create a List
  • Search for your friends in the search bar at the top of the page, or add people from the List Suggestions on the right

Now when you post an update, choose the group who can see it from the list menu.

My book, 100 Amazing Computer Tips - Shortcuts, Tricks, and Advice to Help Everyone from Novice to Professional, is available NOW at Amazon.com and Barnes & Noble in both print and ebook formats. There's also a handy link on top right side of this window.

Happy computing!

Diane


Don't forget to click the Subscribe to 100 Computer Tips in 100 Days via email link on the right side of the screen so you get email alerts when Diane adds a new post.


Wednesday, March 13, 2013

Tip #41 - Facebook Privacy Settings


100 Computer Tips in 100 Days

Tip #41 - Facebook Privacy Settings


The question I’m asked most about Facebook is, “who can view my information.” If you haven’t changed the default settings on Facebook the answer is that everyone can see all of your information. They can’t change it but they can access your timeline and pictures and see who your friends are. If you are troubled by this, let me tell you where you can change these default settings.

 Because Facebook has been criticized in the past for making these settings hard to find, they have added a privacy icon that is available to you all the time in the upper right side of your Facebook screen. Click the privacy lock and you’ll see Privacy Shortcuts such as: Who can see my stuff? Who can contact me? and How do I stop someone from bothering me? Click on the down arrow to adjust these settings. For more settings click the See More Settings at the bottom of the pull down list.

Setting most things to “Friends” will prevent anyone who isn’t your friend from seeing the information. It is a good practice to review these settings periodically because the Facebook people are known to change the defaults periodically. 

Keep reading my blog for information about setting up Facebook lists.

My book, 100 Amazing Computer Tips - Shortcuts, Tricks, and Advice to Help Everyone from Novice to Professional, is available NOW at Amazon.com and Barnes & Noble in both print and ebook formats. There's also a handy link on top right side of this window.

Happy computing!

Diane

Don't forget to click the Subscribe to 100 Computer Tips in 100 Days via email link on the right side of the screen so you get email alerts when Diane adds a new post.

Want more tech news or interesting links? You'll get plenty of both if you keep up with Diane McKeever, the writer of 100 Computer Tips in 100 Days, by subscribing to her Facebook posts or visiting her web page, www.dianemckeever.com . 

Sunday, March 10, 2013

Tip #38 - Managing Friends Posts on Facebook


100 Computer Tips in 100 Days

Tip #38 - Managing Friends Posts on Facebook - Unfollow not Unfriend


I’m sure you love your Facebook friends, well at least most of them, but there are some things  they post that I’m just not that interested in, such as  the high scores they get or their need for flowers, animals or buildings in the latest game craze. Have you ever considered unfriending someone just so you can be free of hourly updates? But you don’t need to do that.  There is an alternative.

When you see one of these posts move your mouse over the post itself. You will see a little down facing arrow or a V in the upper right side of the post. Move your mouse on the arrow and click. From the menu click on unfollow. You will never see another post from that person on your News Feed. If you'd like to see what they've been posting you can always go to their timeline. While there you can click the Follow button to again see their posts. Now, isn't that better than unfriending?


Another option available is "Hide". You can use this to hide all of those Candy Crush updates that friends share with you. When you see one of these posts use the same option menu to choose Hide. This  post will be hidden and you will be given options about hiding future posts that are similar from this game or news feed. By choosing the game feed you will be able to view the posts from that person, but not the game feeds. Whew! Did that cut down the number of posts you have to view? Now you won't be getting Candy Crush updates from any of your friends..


This tip and 99 more are in my book, 100 Amazing Computer Tips. It makes a great present and is only $14.99 for a print version or $7.99 for an ebook!  

Happy Computing!

Diane

Buy my book at Amazon.com. It's only $14.99 and it's packed with 100 Amazing Computer Tips! They're nicely organized and really easy to follow.

Don't forget to click the Subscribe to 100 Computer Tips in 100 Days via email link on the right side of the screen so you get email alerts when Diane adds a new post.

Want more tech news or interesting links? You'll get plenty of both if you keep up with Diane McKeever, the author of 100 Computer Tips in 100 Days, by subscribing to her Facebook posts or visiting her web page, www.dianemckeever.com . 

Friday, March 8, 2013

Tip #36 - Like, Comment or Share on Facebook


100 Amazing Computer Tips

Tip #36 - Like, Comment or Share on Facebook


If you're on Facebook you have probably noticed that under each post there are three possible responses, Like, Comment or Share. Today’s tip will help you understand which is appropriate in which situation.

Like: When you click on the Like option you're telling the person who posted the message that you support what they've written or posted. The person sees the names of all those who have supported their post. There has been talk that Facebook should add a Don't Like option but I can't see that happening. Facebook is a happy place and a Don't Like option would set off negative vibes.

Comment: You Comment when you feel you have something to add to the post. Possibly you're supporting the position taken in the post or encouraging your friend. As with Like, the Comments are generally positive. During the political season the comments sometimes do get negative but that goes with the territory.

Share: When you really like something and want your friends to benefit from or enjoy the post you would click on Share. The post immediately appears on your wall and all of your friends will be able to see it too. This is how things become viral on Facebook. Share is the ultimate compliment on Facebook.  You are stating that the post is worthy of sharing with your friends.

If you notice that your own posts are not getting any of these responses you might consider whether you are posting too frequently. I always know when a particular friend is between college courses and has too much time on her hands. She posts dozens of cute animal pictures. I sometimes want to comment, "Enough with the cute animal pictures. Back away from the computer!"

I hope you are enjoying my daily computer tip posts and would consider sharing some of them with your friends so that they might learn something too. 

Happy Computing!

Diane

Buy my book at Amazon.com. It's only $14.99 and it's packed with 100 Amazing Computer Tips! They're nicely organized and really easy to follow.

Don't forget to click the Subscribe to 100 Computer Tips in 100 Days via email link on the right side of the screen so you get email alerts when Diane adds a new post.

Want more tech news or interesting links? You'll get plenty of both if you keep up with Diane McKeever, the writer of 100 Computer Tips in 100 Days, by subscribing to her Facebook posts or visiting her web page, www.dianemckeever.com . 

Named Cells and Ranger in Excel

Great Computer Tips Named Cells and Ranges in Excel Naming cells Cells already have names such as A1, B27, etc. but you can also give them n...